
Disintegration AI: Build a Particle Exit From One Clear Edge
Create a golden-particle exit in the source room. The subjects dissolve progressively until the room remains empty, with the camera and furniture holding their positions.
Use a short dissolve to end a fantasy scene or transition away from a character. Match the next shot's direction to the drifting particles for a more coherent edit.
Inside this effect
The room remains after the exit
Golden particles dissolve the source subjects from their edges toward their faces. The fixed room and furniture remain after the figures disappear, giving the clip a clear exit rather than only a decorative overlay.
What makes the composition readable
Particles replace information rather than simply decorating it. Decide how long the subject needs to remain recognizable before the dissolve becomes the main image.
Sound in a new creation
A gentle granular sweep follows the dissolving particles, with restrained atmospheric music.
Choose the output for your edit
New drafts start at 12 seconds, 720p and vertical 9:16. Advanced shows the models and compatible lengths, resolutions and formats. Check the total credits before generating; the options follow the selected model.
From source photo to finished clip
Start with a solo or shared photo, or choose two separate sources when the idea includes a pair. Confirm the crop and current settings before generating.
Choose the exit silhouette
Start with a clean edge that can dissolve without losing the subject immediately.
Inspect the particle boundary
Watch the face and hands as recognizable areas become particles.
Place the exit cut
Trim where the dissolve communicates the exit without lingering on unstable detail.
Ways to use the result
A fantasy character exit
Hold the empty room briefly before cutting, letting the absence complete the transition.
A chapter closing
Place the final title after the face has dissolved rather than over the last recognizable expression.
Prepare the source for this movement
- Choose strong subject-background separation.
- Leave empty space beside the dissolving edge.
- Avoid hair and background blending together.
The effect intentionally hides parts of the subject. Particle direction and coverage are not precisely controllable, and continuous facial likeness may be lost.
Frequently asked questions
Can I choose exactly which side dissolves?
There is no directional control in this form; judge the generated movement before planning the cut.
Does the face stay intact to the end?
No. The dissolve eventually reaches the face and leaves an empty room. Use an earlier frame if you need a recognizable portrait.
Why does a busy background hurt the effect?
It makes the boundary between particles and the original subject less readable.
Can it reverse into an appearance?
Reverse the downloaded clip in an editor; there is no reverse-generation switch here.
Should the room also dissolve?
The direction keeps the camera, room and furniture stable while the subjects disappear. Inspect background continuity at the end.
Where is the cost shown, and what if generation fails?
The generation button shows the total for your selected model and output settings. Credits are deducted when the task is created; credits for a task confirmed failed are returned. Review the displayed total rather than assuming every model costs the same.
Explore another direction
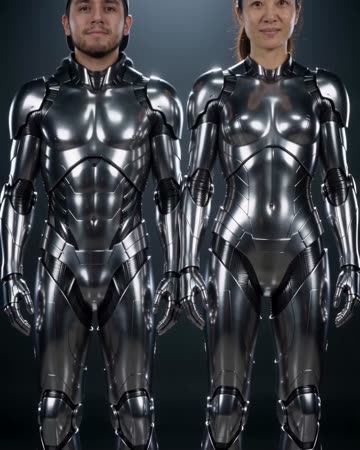
Turning Metal AI
science-fiction edits
A polished chrome transformation travels upward across legs, clothing, torso and finally the face. The camera tilts with the change and ends on recognizable metallic figures.

AI Clone Video
playful introductions
Copies emerge behind the source people in successive rows while the camera eases backward. A solo source keeps one original in front; a two-person source retains both original people.

Levitation AI
fantasy clips
A steady wide view shows the subject rising gently above the ground. Subtle clothing movement supports the floating impression while the visible floor provides the reference for height.
Disintegration AI
Start with a clean edge that can dissolve without losing the subject immediately.
Create this effect